Model Management
Modelibr helps you organize and manage your 3D model library with automatic thumbnails, version control, and easy navigation.
Uploading Models
Drag and Drop
The easiest way to upload models is to drag and drop files directly onto the Model Library panel.
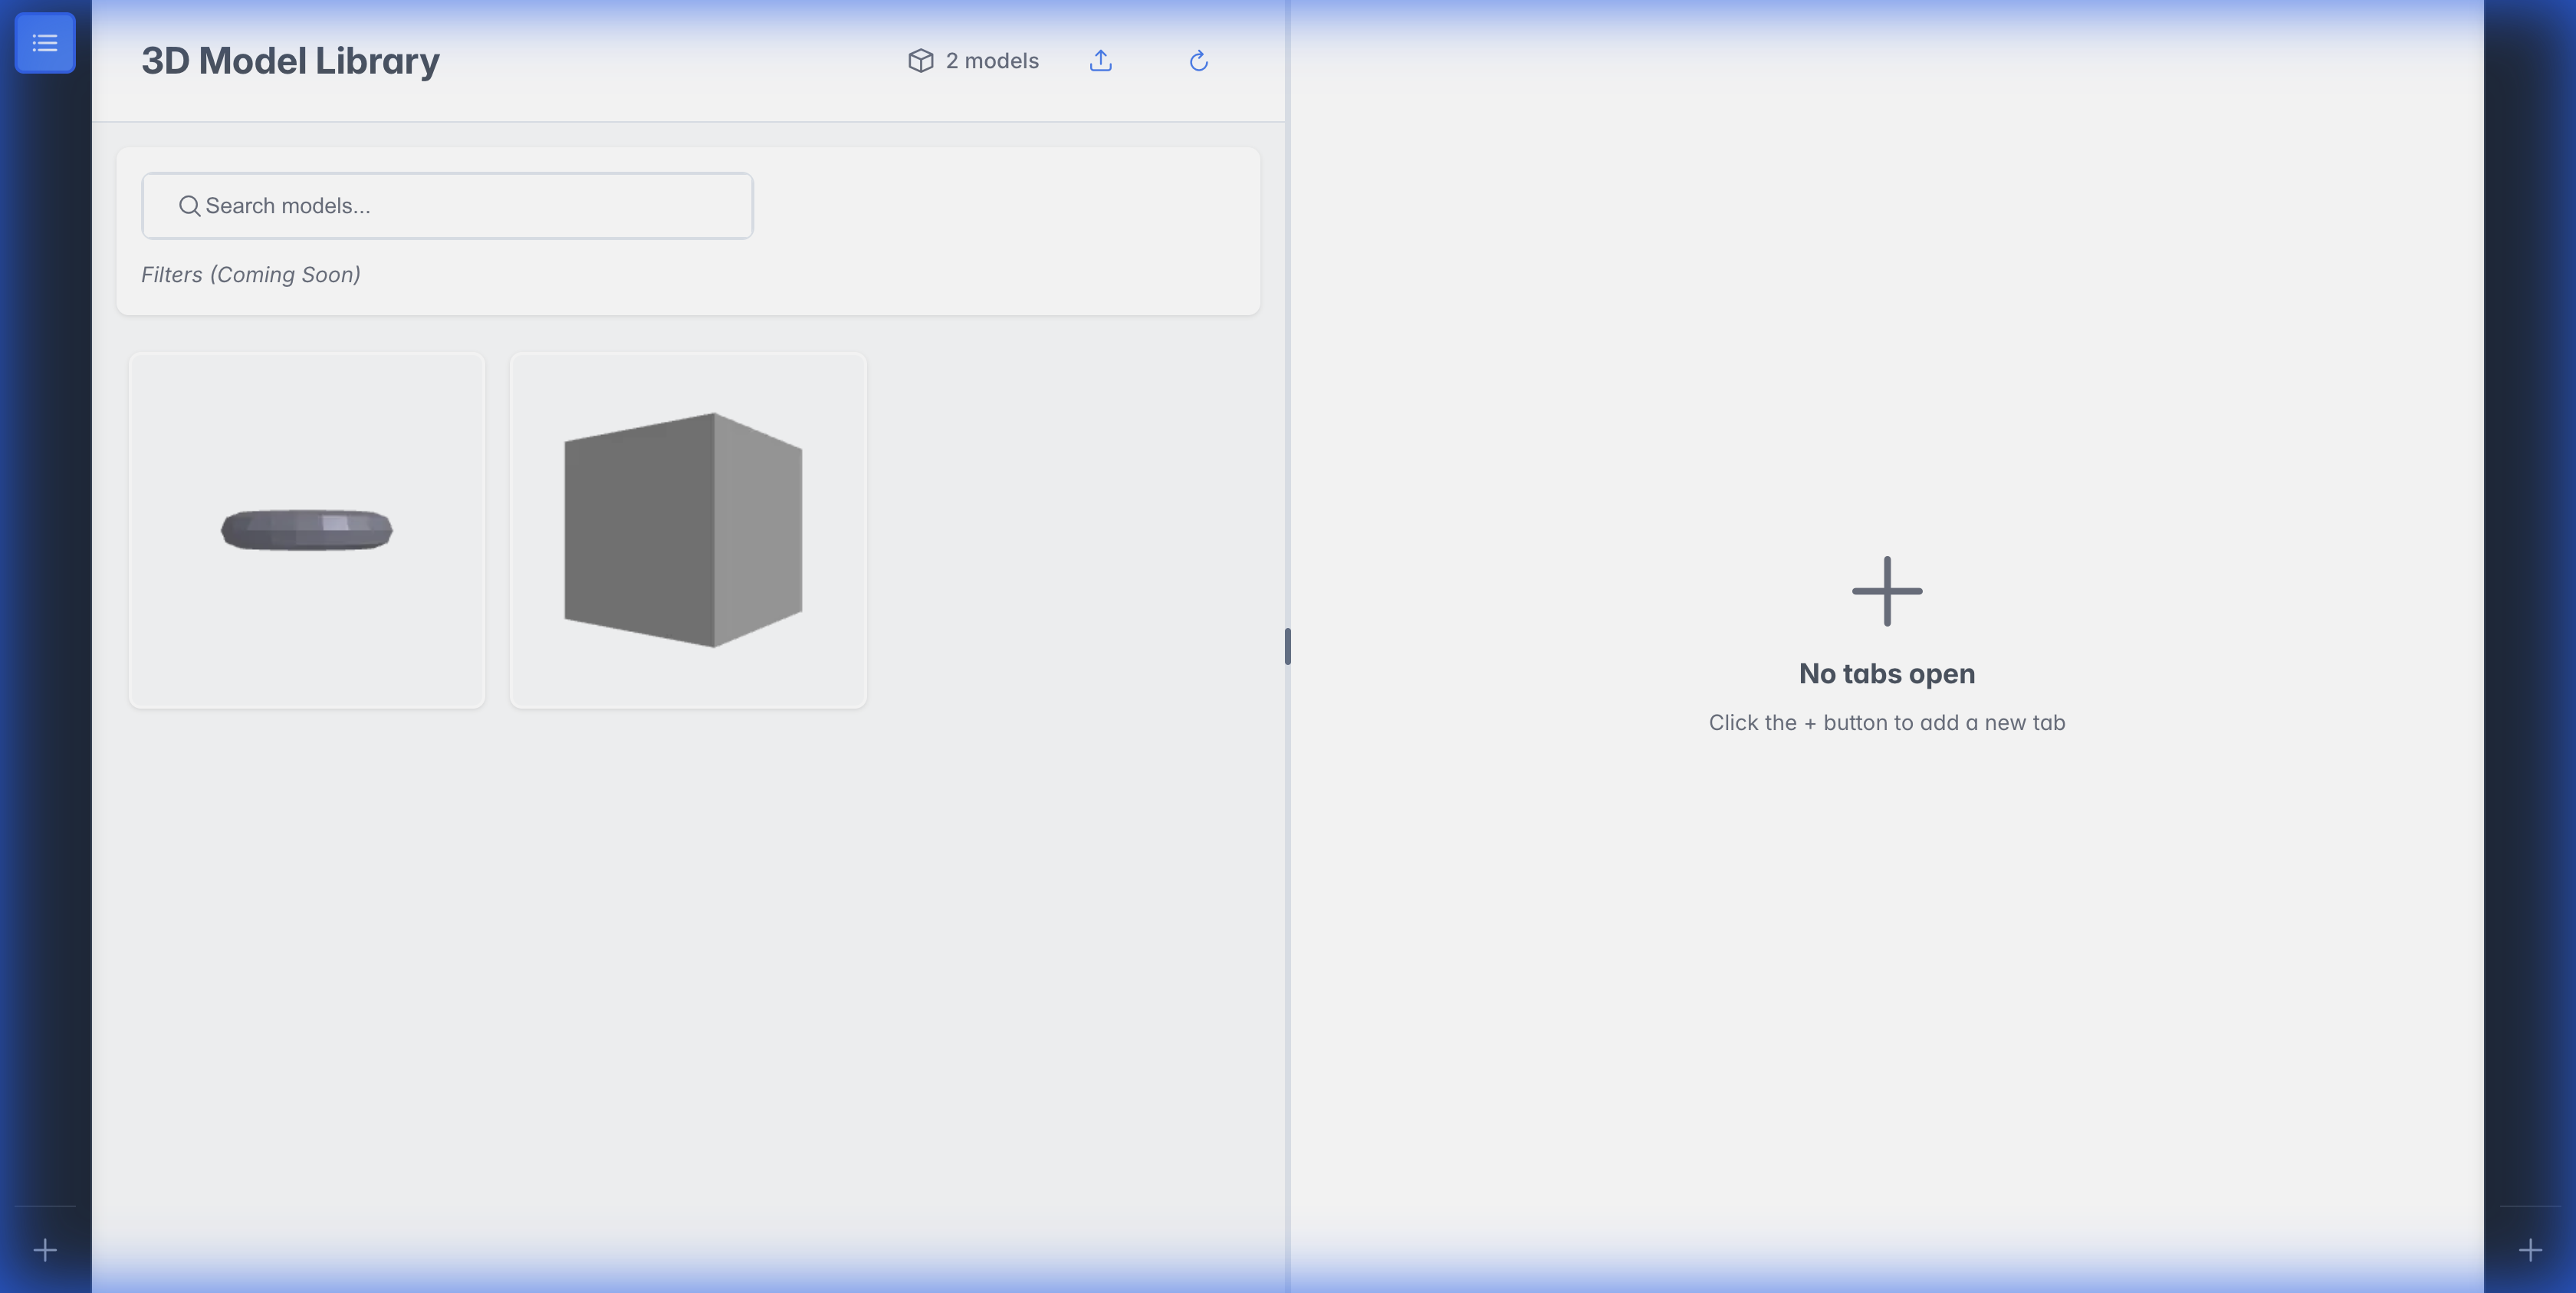
Supported formats: GLB, GLTF, FBX, OBJ, STL, 3MF, Blend
What Happens After Upload
- Model Created - A new model entry appears in your library
- Indexed - The model is walked and made searchable straight away, without waiting for its picture
- Thumbnail Generated - The worker service renders a preview image
- Ready to View - Click to open in the 3D viewer
You can drag multiple files at once. Each file becomes a separate model.
Multi-file glTF (external .bin + textures)
A packed GLB is self-contained and always the recommended path. Some models,
though, ship only as a loose .gltf that references external files - a
.bin buffer and image textures alongside it (the Khronos glTF-Sample-Assets and
many kit layouts). A single-file upload can't resolve those references, so use one
of these instead:
- Import folder (folder toolbar button) - pick the folder that holds the
models. Each
.gltfis grouped with the.bin/textures in its directory and imported together; a whole library of subfolders imports in one action. - Import
.zip(archive toolbar button) - pick a.zipand the app expands it and imports it exactly like a picked folder: same grouping, same format checks, one progress entry per model. The archive is expanded on your machine, not uploaded whole.
The external files are stored with the model and resolved when its thumbnail and
scene graph are extracted, and when you open it in the viewer - so a multi-file
.gltf looks and behaves like its packed .glb twin. Nothing is ever fetched from
the network: only the files you uploaded are used, and a reference that points
anywhere else is refused rather than requested.
Automatic Categories and Tags
An import classifies itself where it can. A new model gets a category worked
out from its own name, the folder it came from, and what the files beside it are
called - which is how SM_Veh_Wheel_03 ends up under Vehicles - plus tags
from the folder's name.
It only ever suggests:
- A category is filled in only when the model has none. One you set is never replaced.
- Tags are added, never removed.
- It runs once per model, when it arrives.
Everything it works out waits for you. A strip above the model grid says how many models were categorized automatically; Review lists them with what was chosen and the folder it was chosen from, and Keep all clears the queue. In the review list you can pick out individual models and keep or undo just those - undoing takes back only what the import applied, never a category or tag you have set since.
The folder is known for imports that come from a path or an archive. A file dragged into the browser carries a name and nothing else, so those models are classified from their name alone.
Organizing with Categories
Use the category sidebar (left of the grid) to organize models into groups:
- Right-click anywhere in the sidebar and choose Add category, then type the name directly in the tree
- Right-click a category to Add subcategory, Rename, or Delete it
- deleting removes the whole branch, and its models become uncategorized
- Drag model cards onto a category in the sidebar to move them - dragging a selected card moves the whole selection
- All shows every one of your models; Unassigned collects models that aren't in any category
The Categories toolbar button hides or shows the sidebar; a badge on it reminds you that a category filter is active while the sidebar is hidden. The sidebar appears on the standalone Models tab - model grids embedded in packs and projects are not category-filtered.
Viewing Models
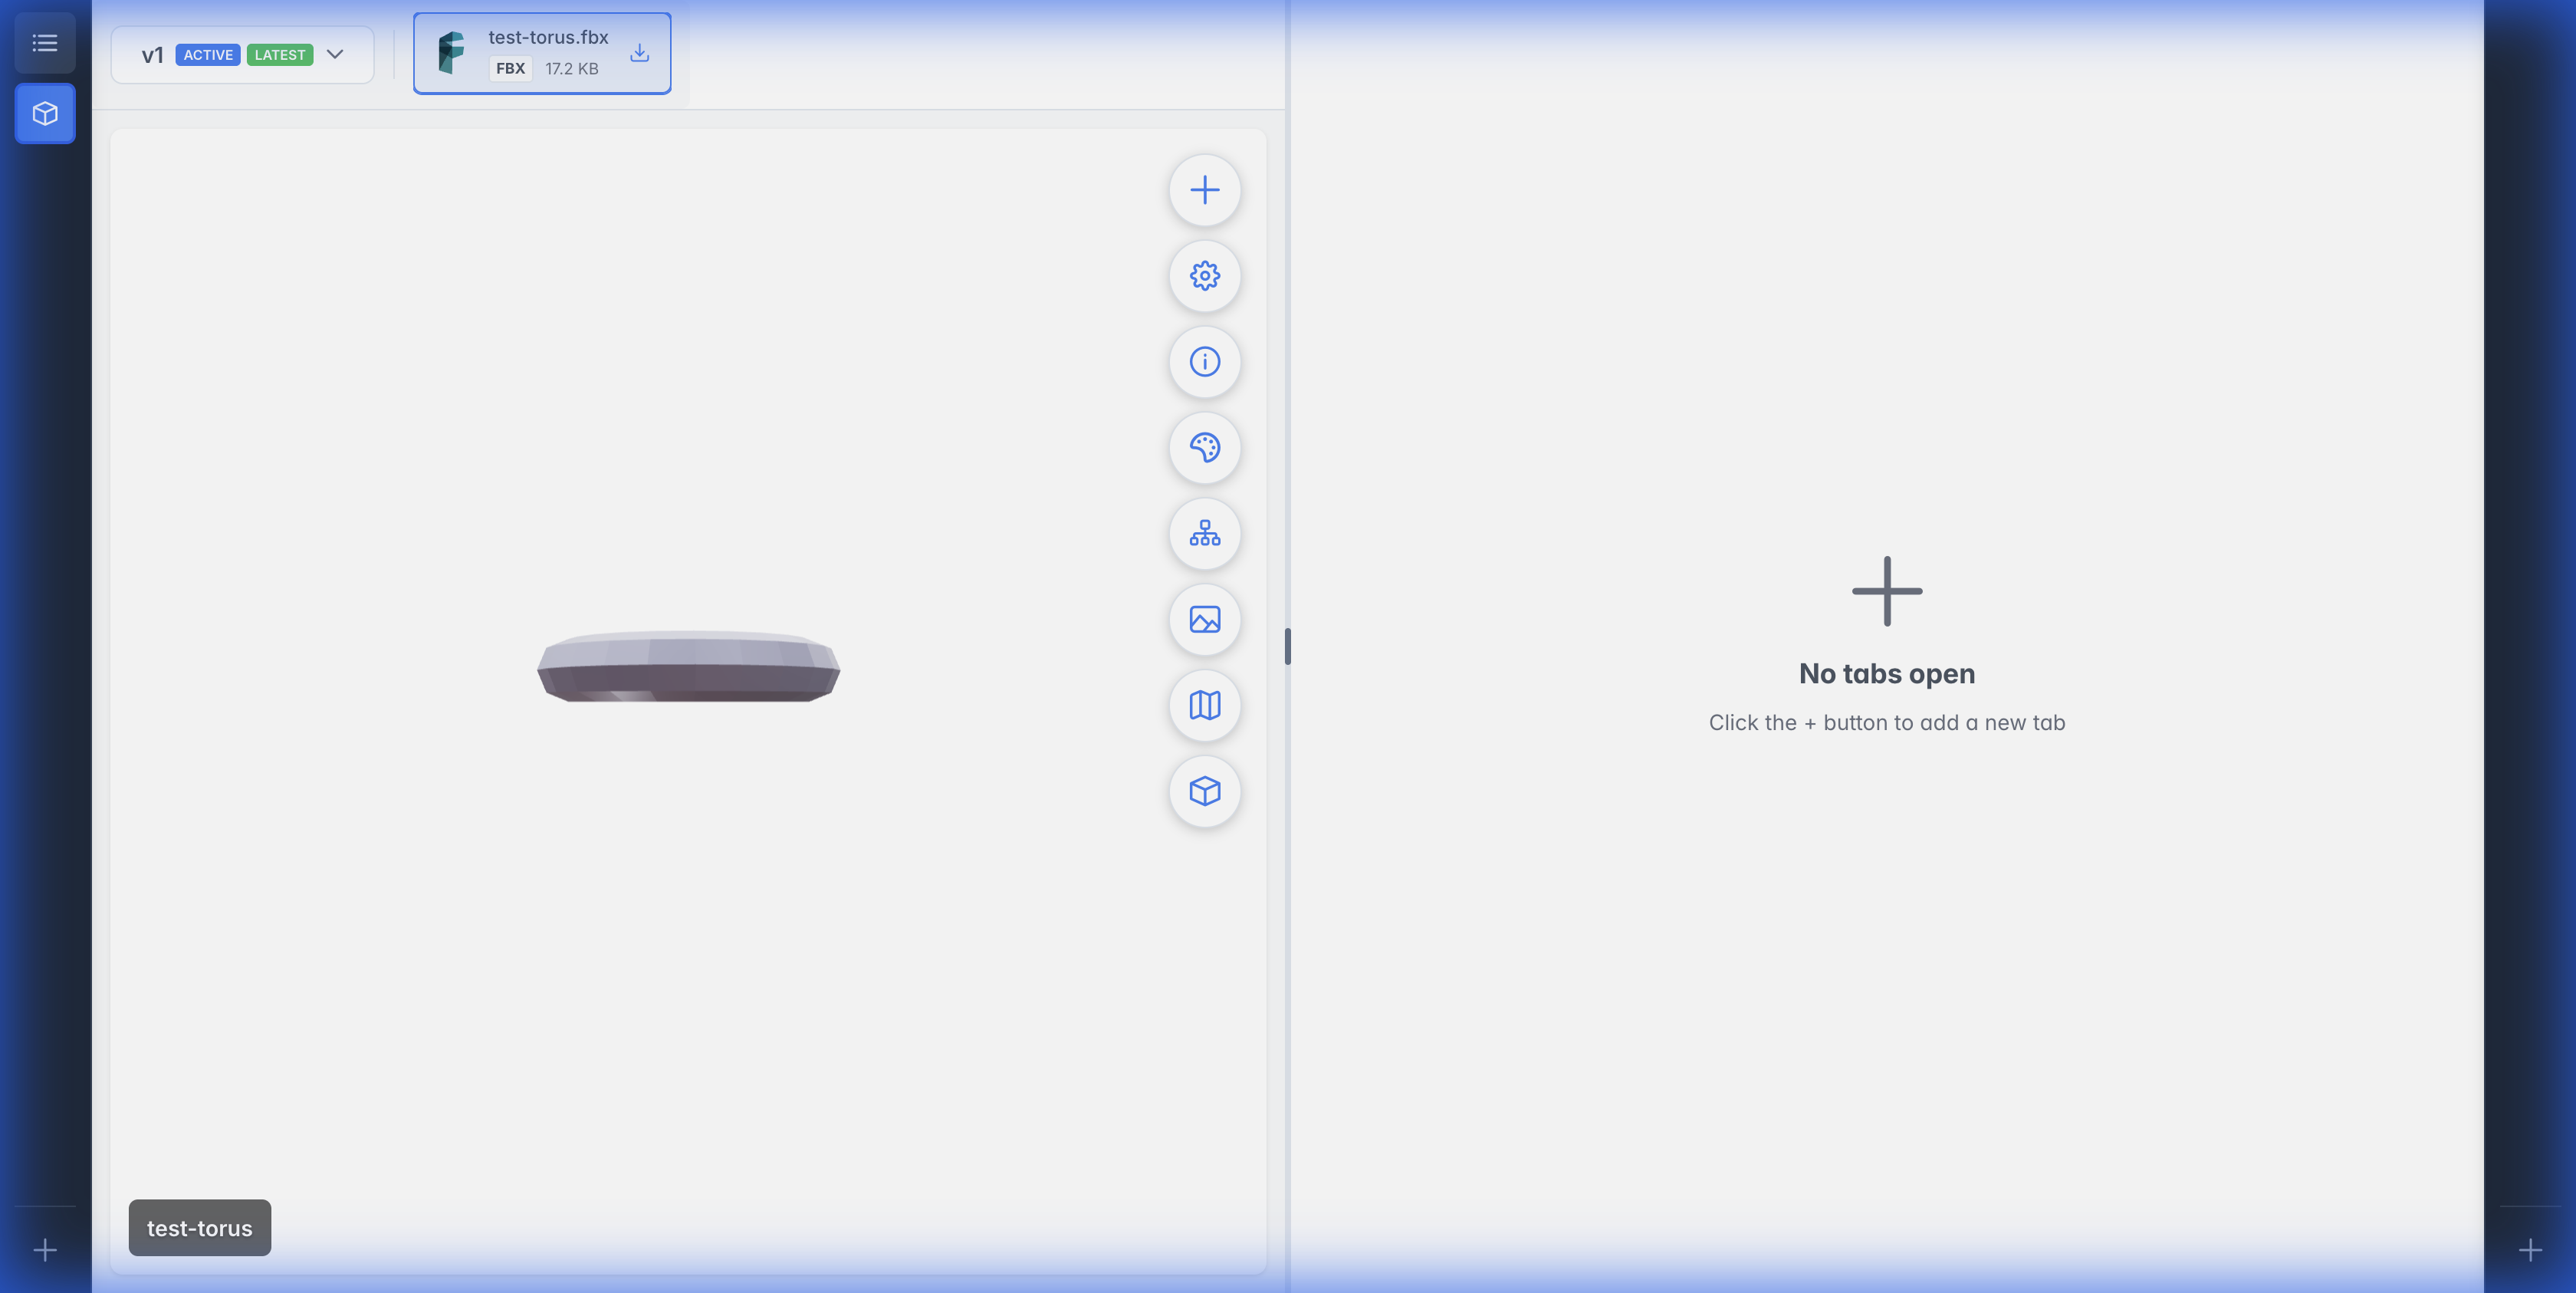
Click any model card to open it in the 3D viewer:
Viewer Controls
| Control | Action |
|---|---|
| Left Click + Drag | Rotate camera |
| Right Click + Drag | Pan camera |
| Scroll Wheel | Zoom in/out |
| Double Click | Reset camera |
Control Buttons
The viewer includes floating control buttons:
- Add Version - Upload a new version of this model
- Viewer Settings - Adjust lighting and environment
- Model Info - View file details and metadata
- Metadata - Edit what the asset says about itself: description, style, theme, licence, author and provenance
- Texture Sets - Apply textures to the model
- Model Hierarchy - Explore mesh structure
- Thumbnail Details - View and regenerate thumbnail
- UV Map - Preview UV mapping
Metadata
The Metadata panel edits everything an asset can say about itself, laid out from the versioned metadata schema rather than a per-page form - so all six asset families share one contract and one set of vocabularies.
Fields are grouped as identity, classification, description, rights, provenance and technical. Style and theme are closed vocabularies: a value outside them is one no search filter will ever match, so the picker offers the schema's own list.
Two things it deliberately does:
- Read-only fields are shown, not hidden, with a badge saying where the value came from
(
imported,derived). An imported licence is how an asset states its rights; hiding it would make a store import look like an asset nobody knows anything about. - Saving sends only what changed. Clearing a field sends an explicit "no value" rather than an empty string, and untouched fields are not sent at all - so saving this panel cannot overwrite something an agent wrote while it was open.
The header counts how much is filled, over the fields a person could actually fill. Derived values are excluded: an asset is not complete because the extractor did its job.
Version Control
Each model can have multiple versions, allowing you to track changes over time.
Adding a New Version
- Open a model in the viewer
- Click Add Version
- Select a new model file
- Optionally add a description
- Choose whether to set as active version
Switching Versions
Use the version dropdown in the viewer header to switch between versions. Each version has its own:
- Thumbnail
- File(s)
- Default texture set
Deleting Models
Models are soft deleted to the Recycle Bin, allowing recovery if needed.
- Right-click on a model card
- Select Recycle
- Model moves to Recycled Files
Deleting a model with multiple versions will recycle all versions together.